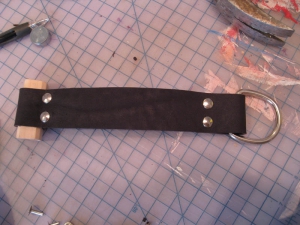
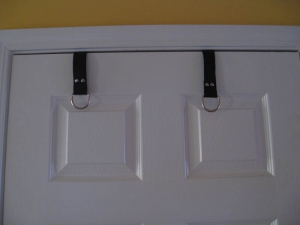
Today we're going to make some over-the-door bondage straps. These are perfect for the kinster on the road. Just throw these babies over your hotel bathroom door and you're guaranteed to have the manager knocking!
In all seriousness, though, this is the perfect starter project for anyone wanting to make some kinky toys with leather. It's simple to make, has very few parts, and requires a minimal investment in tools and materials.
Let's get started by learning a little about buying leather.
Leather is typically priced by square foot and sold in sheets of twenty or more square feet. The thickness of leather is measured in ounces where 1 oz. is about 1/64 inch. So, if you want a piece that is 1/4 inch thick, you'll want to buy 8 oz. leather. The leather manufacturers try to make the leather as consistent in thickness as possible, but we're talking about cow skin, so you'll usually see the leather marked 2-4 oz. or 4-6 oz., etc. When I'm making bondage equipment, I try to stick with 7-8 oz. leather. Anything less that about 6 oz. gets a little stretchy and probably shouldn't be used, especially if you plan on supporting a person's body weight.
Unless you find a really good deal on the leather, a full side is going to cost more than $100. While this is definitely the way to go if you're going to be making a lot of "stuff", it's a pretty big investment if you're just getting started. If you're planning to make these bondage straps, cuffs, etc. you can buy cowhide strips that leather manufacturers sell for making belts. Tandy Leather Factory sells the strips for a pretty reasonable price here.
- 1 - 1.5" welded steel D-Ring
- 1 - 1.5" long piece of 3/4" diameter dowel
- 1 - 1.25" x 12" piece of 7-8 oz. leather strapping
- 4 - "Rapid Rivits"
- A hammer or wooden mallet
- leather punches (I use these)
- Rivet Setter
- Rivet Anvil
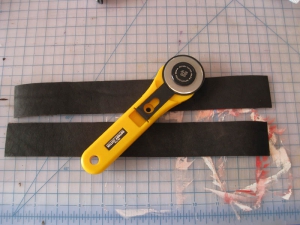
The first thing you'll need to do is cut your leather to size. I use a straightedge and a standard rotary cutter. I've used everything from utility knives to specialty tools for making straps for cutting leather. In my opinion, the rotary cutter and a straight edge is by far the best way to go for cutting straight lines. If you're cutting curves, you'll want to use good quality, heavy-duty upholstery scissors.
Once you've cut the straps to size, the next step is to punch the holes for your rivets that will hold the D-ring. It's really important to pick the correct punch so that the hole is correctly sized for the rivet that you're using. I like my holes to be just a little smaller than the diameter of the rivet shaft. If the hole is too big, the rivet has the tendency to shift when you're setting it making for weak and unattractive joints.
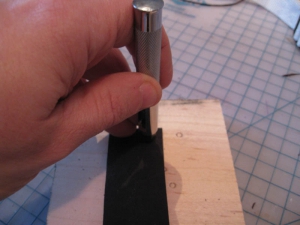
To lay out the holes, draw a line 1/2 inch from the end of the strap. Then make marks on the line 1/2 inch from each side. This is where you'll punch your first set of holes. Place the leather on a scrap piece of wood. Line up your hole punch with the marks and hit it firmly a couple of times with your mallet or hammer.
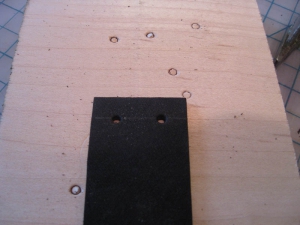
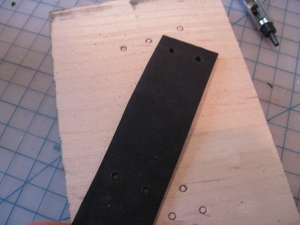
Here are the finished holes. Make sure that you've hammered the puch all the way through the leather, but not "too far". The hole punches taper out and will stretch the hole out when you punch too far. You should get the hang of punching just through the leather so that your holes are consistent in size.
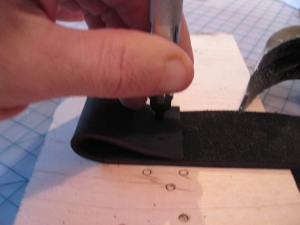
Next you'll punch the second set of holes for the D-ring. To make sure that my holes line up exactly, I like to use the first set of holes to make my alignment marks. Fold the strap over about an inch or so. Holding the strap in place, place the punch through the first set of holes and push down to make marks in the bottom piece. Then you can unfold the leather and use the marks you made to punch the next set of holes.
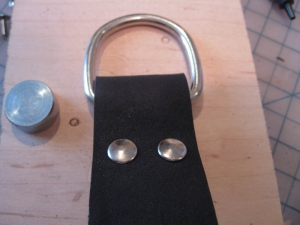
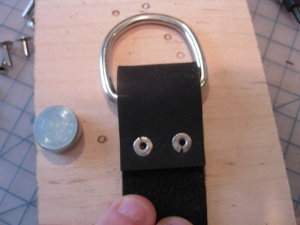
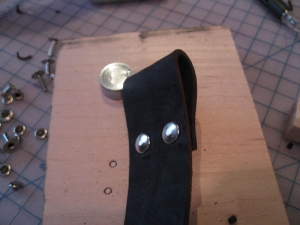
To attach the D-ring, slide it over the leather, fold the leather over lining up the holes, place the rivet posts through the holes and place the rivet caps onto the posts.
The rivet starter set comes with a small "anvil" and a setting tool. Different rivet starter sets come with slightly different setting tools, so you'll want to follow the instructions that come with your kit. In most kits, the anvil has both a flat and a concave side. You'll want to use the flat side.
Place the strap over the anvil so that the post side (bottom side) of the rivet is on top of the anvil. The setting tool will also have both flat and concave ends. Hold the concave side of the tool against the rivet cap. Strike the tool with your hammer or mallet firmly. You'll want to make sure your tool is perpendicular to your table and that you hit the tool evenly so that the rivet sets straight. It's a good idea to set a couple of practice rivets in some scrap leather since it can take a couple of tries to get the hang of it.
Next, you'll need to repeat the above procedure to create the loop that the dowel will slip into.
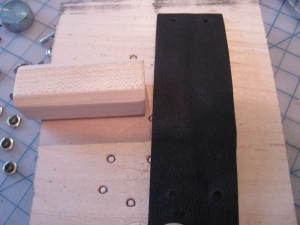
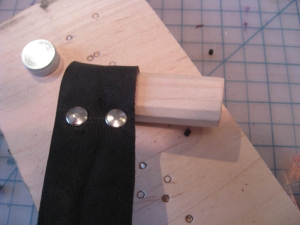
Punch the first two holes in the other end of the strap using the same measurements as above. To determine the location for the other two holes, you'll need to measure the circumference of the dowel and then add another 1/4 inch (to account for the thickness of the leather). In my case that measurement was about 2 1/2 inches. Draw a line across the strap 2 1/2 inches (or what ever measurement you came up with) down from the center of the holes you punched.
Fold the leather over and center the line that you just drew in the center of the first set of holes and use your punch to mark the location (just like before). Unfold the leather, punch your holes, and set the rivet.
Fold the leather over and center the line that you just drew in the center of the first set of holes and use your punch to mark the location (just like before). Unfold the leather, punch your holes, and set the rivet.
If you measured correctly, you should be able to just slide the dowel into the "hole". You want a pretty snug fit so that the dowel won't fall out while your playing.
